Motif background
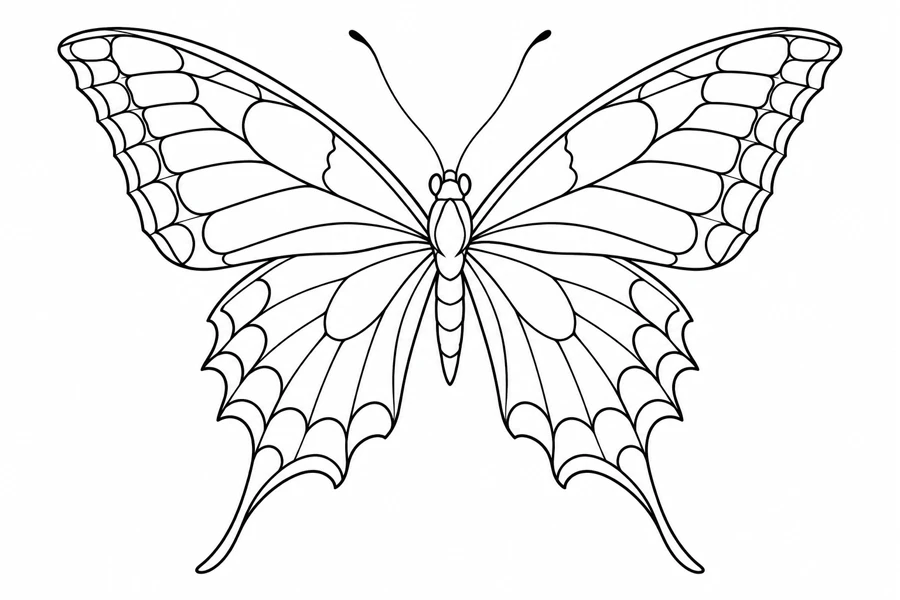
The Florida Museum’s eastern tiger swallowtail profile illustrates hindwing tails alongside markings that vary across forms. The front-facing art here emphasizes a pair of tapered tails and simplified wing marks. It works as a stylized swallowtail reference, with the museum specimen providing a comparison for the anatomy.
Florida Museum eastern tiger swallowtail profile
Placement to compare
Compare an upper arm mockup with a shoulder blade mockup and check where the two tail tips finish. A body-centered view makes it easier to judge whether one tip wraps away.
Linework and shading to discuss with your artist
Ask the artist to evaluate the tapered silhouette before choosing how much interior shading to include. Compare the separation between each tail and its nearest wing mark.
Needle grouping terminology from Cheyenne
Give the swallowtail tips room in the outline
Choose the swallowtail when the taper at the lower edge is part of the silhouette you want. A monarch offers a broader wing pattern around the body, and a Blue Morpho puts more emphasis on the spread across the upper wings. The swallowtail spends some of its height below the centerline on the two tails. Compare the outline of the whole insect on the available paper area before choosing a span. If the lower boundary is curved or angled, see whether both tips can reach their intended length inside it without moving the body away from its planned position.
The main tracing decision is what detail to keep around the tails. An interior line that comes too close to a tail can make the tapered edge look like a block or notch. Try a tracing that follows the lower wing all the way into each tip and leaves a little open space between the silhouette and the nearest pattern marks. Then compare a more detailed version in which you add the markings back selectively. The tail shape should remain obvious in both copies, even if you choose different levels of detail in the upper wings.
Compare the shape at the size you plan to use
Mark the widest point across the upper wings and measure down to both tail tips. Position the body on the paper before choosing which way to angle the proof. On a curved mockup, one tail may run into a boundary even if the upper wings fit. Turn the tracing while keeping both tips in view, then compare a shorter placement at the same wingspan. That reveals whether there is room for the tails without changing the characteristic taper.
A comparison checklist for Swallowtail Butterfly
- Check that the outer wings and both long hindwing tips fit inside the marked paper area.
- Compare the tip of each tail with the pattern beside it. In the smaller draft, preserve the tip silhouette first.
- Mark which side of the paper holds the tails before rotating the print to judge the available space.
Compare the bottom outline with the nearby wing cells covered by a small strip of paper. If both tails still read distinctly, restore the cells and see which mark changes the taper most. Use two prints at the same wingspan to compare a clean tail area with the fuller pattern. Keep the edge of the tail fixed during the comparison so it is clear whether the thinner-looking point came from removing an interior mark or from changing the silhouette itself.
Decide which details belong in the linework
Follow the lower wing edge through the scallops and into each pointed tail. Check the pale space between the tip and the nearest inside vein. If a dark join interrupts that space, try shortening the inside mark while keeping the longer line that carries the wing shape. Use a stronger outline at the tail than for the small cells around it. Keep the matching tip on the other side visible while you compare changes so one side does not end up heavier.
Check the wing shape before the interior pattern. The body and outer contours should remain visible at the proposed size. In a spread-wing design, compare matching areas on both wings. In a profile, identify the overlap that shows which wing is nearest. Keep that boundary readable when reducing the other markings.
Check a plain-paper print at actual size
After printing the draft at Actual Size, examine both tails before checking the upper-wing pattern. If one tip looks blunt, compare the outline in the original with the gap beside the neighboring mark on the proof. Print an alternate that omits the single inside mark nearest that tip while keeping the original wingspan. If both tips still lose their shape at that scale, keep a larger proof for comparison and check where its lower edges sit in the marked area.
Inspect both tail tips in the printer preview before printing a tall layout. The bottom margin can clip a tip while the rest of the wings appear complete. If the drawing spans sheets, try keeping both lower wings together and place any join higher across the design. Where a seam cannot be avoided, align the lower wing edge and a second interior curve before judging the taper. Check the outline of each tip against the original after the sheets are joined. See the actual-size printing guide for calibration and page alignment.
Keep a record of the direction and the chosen draft
Mark which side of the proof holds the longer-looking tail at the chosen angle, and label the body axis before sharing the file. Record the wingspan together with the height to the tail tips. That helps a second printer or artist reproduce the clearance below the wings. Keep the full wing pattern as the reference and give any cleaner tail version a separate label, so a small omission near the tips is not mistaken for a clipped part of the export.
 Tattoo Stencil
 Buy me a coffee