Motif background
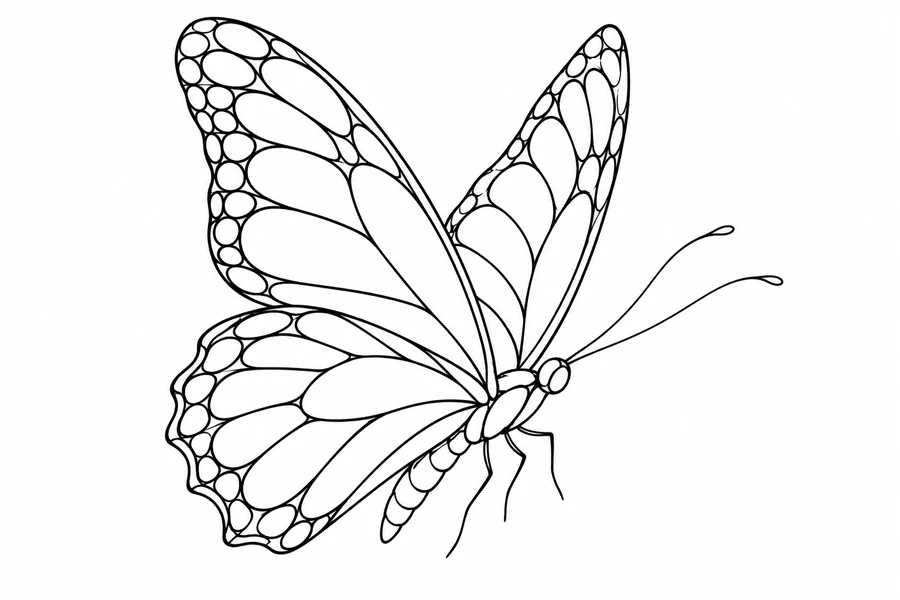
This study uses a three-quarter pose to suggest a butterfly viewed from the side. The raised foreground wing hides part of the farther wing, and the outlined spots sit inside the visible surfaces. A closed-wing photograph in the University of Florida giant swallowtail profile is a useful comparison for the change in view. The drawing here has no species attribution.
University of Florida butterfly photographs and wing views
Placement to compare
Try the tall silhouette along the forearm and angle a second copy on the upper arm. Mark which direction the raised edge points when the body sits upright.
Linework and shading to discuss with your artist
Ask the artist to compare the outline where the wings overlap with the lines around each spot. Their relative weight determines which wing appears in front.
Needle grouping terminology from Cheyenne
Use the raised wing to compare narrow placements
The profile uses height and overlap to suggest the angle of the butterfly. Compare it with the Folded Wing Butterfly if you want a more upright silhouette or the Butterfly in Flight if you want one wing to reach farther to the side. A front-facing monarch is useful as a width comparison at the same approximate height. Place each paper outline against the same marked area to see how much space remains beside the body and behind the higher wing. That remaining space can be as important as the measured width when you decide which way the butterfly should face.
Trace the edge of the foreground wing before you include the outlined spots. A clear boundary shows that one wing sits in front of the other. Spots close to that boundary can look like parts of the overlap when the design is reduced, so choose a few spots with enough space around them to read on their own. Keep the main outer contour fixed while comparing the simpler and fuller versions. This makes it easier to judge whether the added spots reinforce the wing angle or pull attention away from it.
Compare the shape at the size you plan to use
Mark the height of the raised wings and include the antenna tips when checking the width. Set the body along the direction you want on a narrow forearm paper mockup. Turn the outline and see how much room remains in front of the antennae and behind the higher wing. If the tall wing fits but an antenna reaches too far sideways, compare a more upright angle at the same size before taking space away from the wing overlap.
A comparison checklist for Butterfly in Profile
- Keep the tilted raised wing and the shorter overlapping wing in the same outline.
- Make the overlap legible on paper before trying a larger set of wing spots. Leave a gap where spots approach that edge.
- Compare the direction of the raised wing on the two proofs, then label the version with the preferred flow.
Compare the profile with a narrow paper strip temporarily covering the nearest wing spots. Follow the leading edge from the upper tip toward the body and notice whether the overlap still identifies the foreground wing. Then uncover the spots and see whether one of them competes with the join. On a second draft, preserve the shape of both wings and vary only that spot. This shows which detail changes the impression of depth without confusing it with a taller or more upright version.
Decide which details belong in the linework
Keep the boundary of the foreground wing clear where it crosses the smaller wing behind it. Inspect the nearest outlined spot and the gap between that spot and the overlapping edge. If they almost touch, shorten the spot’s outline or omit it from the alternate tracing before weakening the edge that shows the wing order. Give the antennae space at their tips and keep their strokes lighter than the outer wing line when comparing the two drafts.
Check the wing shape before the interior pattern. The body and outer contours should remain visible at the proposed size. In a spread-wing design, compare matching areas on both wings. In a profile, identify the overlap that shows which wing is nearest. Keep that boundary readable when reducing the other markings.
Check a plain-paper print at actual size
On a plain-paper print, look first at the overlap near the body and see whether the nearer wing still reads as a separate shape. If a nearby spot looks connected to the overlap, circle it and print another proof at the same height with that single spot removed. Compare the antenna direction and the height of the raised wing before labeling the preferred version. If both copies lose the wing separation, try a wider gap at the overlap rather than making every line darker.
For a tall proof, make sure the antennae and top wing tip are fully inside the printable area before you judge the placement. If the layout spans sheets, try to keep the crossing of the wings near the body on a single sheet. When that is not possible, match the outside contour of the nearer wing and a separate interior spot across the overlap. A mismatch at the seam can make two outlines look joined even when they are separate in the file. See the actual-size printing guide for calibration and page alignment.
Keep a record of the direction and the chosen draft
Use the raised wing and the direction the antennae point as the two orientation marks on the chosen proof. Record the height to the wing tip and the width including the antennae, since cropping around the wings can hide a clearance problem. Name a version with a reduced spot pattern separately from any mirrored print. Include the original illustration so the artist can see which wing is intended to sit forward and which spot was changed to preserve that reading.
 Tattoo Stencil
 Buy me a coffee