 Tattoo Stencil
Design notes
Measure from the bud to the end of the stem. The branch tips take up more width than the closed bloom.
Artwork source
Vector line art from the Tattoo Stencil collection.
 Buy me a coffee
Botanical · Tattoo stencil design
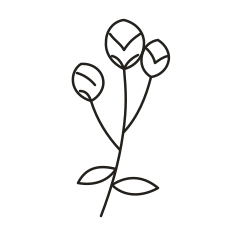
A single closed rose on a slender stem with two rising side branches.
Measure from the bud to the end of the stem. The branch tips take up more width than the closed bloom.
Vector line art from the Tattoo Stencil collection.
The stem rises between three buds. The tallest bud sits near the center, the lower bud leans to the left, and the small upper branch pushes to the right. Below them, two low leaves establish a broad point without taking much height. Compare the full sprig with the single Rosebud if you are working with a narrow strip of space. The sprig adds a series of small silhouettes to follow, so the total width includes the two side branches as well as the leaves.
On a paper proof, check each bud at its attachment to the branch. Try covering one side bud with a scrap of blank paper and see what changes in the outline. This quick comparison makes it easier to decide whether the three shapes are worth the extra space. When refining the drawing, try simplifying a fold inside the smallest bud before reducing the gaps between stems. Keep the longest stem line continuous so the separate buds still read together.
Lay a slim strip of paper along the forearm area you want to compare and mark its narrowest point. Position that mark near the long stem below the side branches, where the drawing is naturally narrow. The upper part needs room for buds on both sides, while the low leaves make a separate broad point. Try sliding the mockup up or down before changing its scale. That shows whether the available width works in both places at once.
Draw three light horizontal marks at the upper edges of the buds on an overlay. Put the whole sprig next to a single bud proof and compare where the eye moves as you follow the marks from lowest to highest. The side buds give the sprig a staggered rhythm that a wider center bud cannot reproduce. If the sprig feels busy in a narrow placement mockup, compare the two designs at the same total height. Keep the low leaves in view so the comparison includes the entire footprint.
Look at the upper right bud where its short inner line turns downward before reaching the outside edge. At a hypothetical 72 mm artboard width, the SVG stroke scales to 0.75 mm digitally. Use the open area around that inner line to compare the versions on paper. If it turns into a solid crease, leave the outline of the bud and its branch alone and shorten the inner line. Check that the right bud still looks distinct from the taller center bud.
Follow the line from the tip of the flower or leaf to the end of the stem. Where petals overlap, decide which edge describes the front petal. If both edges merge in the proof, keep the stronger boundary and try a simpler version of the smaller fold. Leave the outline in proportion.
Look at the two low leaves as a pair after printing at the intended height. The right leaf attaches slightly lower than the left and extends farther across the sheet. If the leaves look like a single bow shape, mark the stem joins and compare their positions against the source. Check first whether scaling or a cleanup setting closed the pale space beside one join. Try restoring that opening on a second proof before discarding a leaf or changing the length of the sprig.
A tall sprig may fit on one portrait sheet even when the preview defaults to a wider layout. Check the full length from the highest bud to the bottom of the bare stem at the chosen print scale. If you need two sheets, try a join between the low leaves and the bud branches, where the central stem gives a clear line to follow. Mark its path in both overlaps and check that the branches above still lean toward the same sides after alignment. See the actual-size printing guide for calibration and page alignment.
Include all three bud tips when making a reference photo of the selected proof. Mark the lowest side bud as an orientation cue, then record which direction the bottom stem will face in the placement sketch. If one alternate removes an inner line from a bud, identify that bud by position instead of calling the file simply cleaner. The explicit label helps the recipient distinguish a simpler bud from a shortened stem or a mirrored branch layout when the thumbnails look much alike.