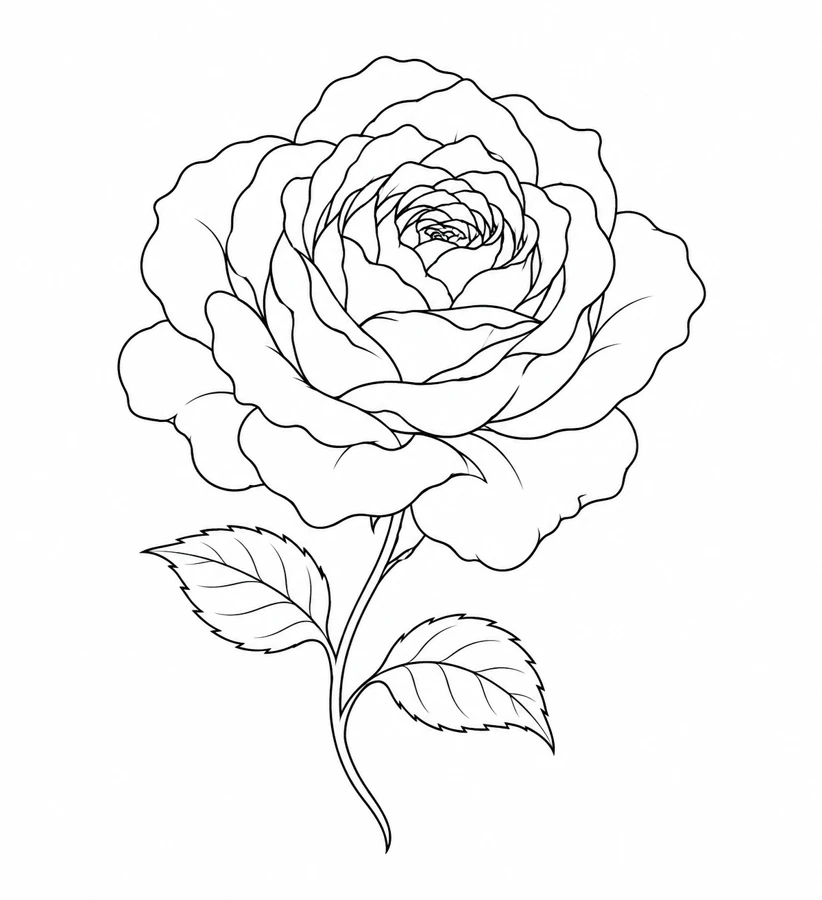
Compare an open rose with a narrower bloom
This rose presents its flower face as the main shape. The broad outside petals make the bloom a better comparison for a space with room across the top than the Rosebud, whose closed flower can fit a narrower mockup. The Rose Branch is a third option if you want the eye to travel along a diagonal and find more than one bloom. Compare the three by holding their stems in the same general direction while you look at how far each flower reaches sideways. That reveals whether the available width needs to be reserved for one open bloom or shared across several smaller forms.
To simplify the open rose, trace the outside petals and the first continuous boundary around the center. Compare where those lines meet with the source to identify which folds carry the turn of the flower. A fold that shows one petal tucking beneath another may add more information than a cluster of short marks that only describe texture. Keep the leaf tips distinct from the flower outline when you compare versions. Those shapes counterbalance the open petals, and dropping them can change the character of the design even if the bloom stays intact.
Compare the shape at the size you plan to use
Measure across the broadest outside petal and leave space for the two pointed leaves below it. On a paper upper-arm mockup, put the open bloom where the available area is broadest, then let the stem follow the narrower part. Rotate the whole outline slightly before reducing it. If one leaf projects beyond the marked edge while the flower itself fits, changing the angle may be enough to preserve the wider bloom and its layered center.
A comparison checklist for Open Garden Rose
- Measure across the open bloom and include the full stem when checking height.
- Compare the smallest crease in the center with a nearby outer petal. Retain the crease that explains the most visible overlap.
- Check where the curved stem leads the eye. An opposite-facing copy is a separate draft worth labeling.
Compare the large rounded bloom with its leaves showing and then with the leaves covered by scraps of paper. If the bloom looks round enough on its own but feels unbalanced in the complete design, the direction of a pointed leaf may be driving that impression. Move the paper mockup or try a leaf silhouette at a different angle before editing the petal stack. Keep a copy with the original leaf positions so the comparison does not confuse a change in composition with a simplified flower center.
Decide which details belong in the linework
Look at the pale sliver between two inward petal folds just beside the center. Keep the longer edge that shows one petal passing behind the next and test a lighter or shorter mark for the inner crease. If the sliver closes when you strengthen both strokes, remove the short crease from a copy before changing the outer petals. Use the same treatment for both leaves only after checking that the leaf veins have enough room beside their pointed edges.
Follow the line from the tip of the flower or leaf to the end of the stem. Where petals overlap, decide which edge describes the front petal. If both edges merge in the proof, keep the stronger boundary and try a simpler version of the smaller fold. Leave the outline in proportion.
Check a plain-paper print at actual size
Compare two Actual Size copies of the same bloom with the centers in view. If the inner folds read as a dark dot on the smaller print but you can still follow the outer petals, circle the first fold that loses its separation. Test one draft with that crease omitted, then print it at the smaller width again. If the center still looks filled, keep the wider proof for comparison and keep the narrow version as a simpler tracing rather than darkening the folds further.
For a paper proof large enough to span sheets, keep the petal center on one side of the join. Use the stem curve and the outline of a pointed leaf to check how the sheets register before deciding that a petal has changed shape. If the printer clips the widest petal while leaving the pointed leaves visible, move the artwork on the sheet or choose a larger paper layout. Recheck the bloom width afterward so a print setting has not quietly reduced the study. See the actual-size printing guide for calibration and page alignment.
Keep a record of the direction and the chosen draft
Mark which side the stem bends toward and which leaf reaches farther on the chosen proof. Those features are easier to recognize than individual petal folds if the file is turned or mirrored. Label drafts that use the full center and the reduced folds separately, even when they share the same bloom width. Save the source beside the print and note any change to a leaf angle, so the artist can tell which differences came from placement and which came from cleaning up the flower.
 Tattoo Stencil
 Buy me a coffee