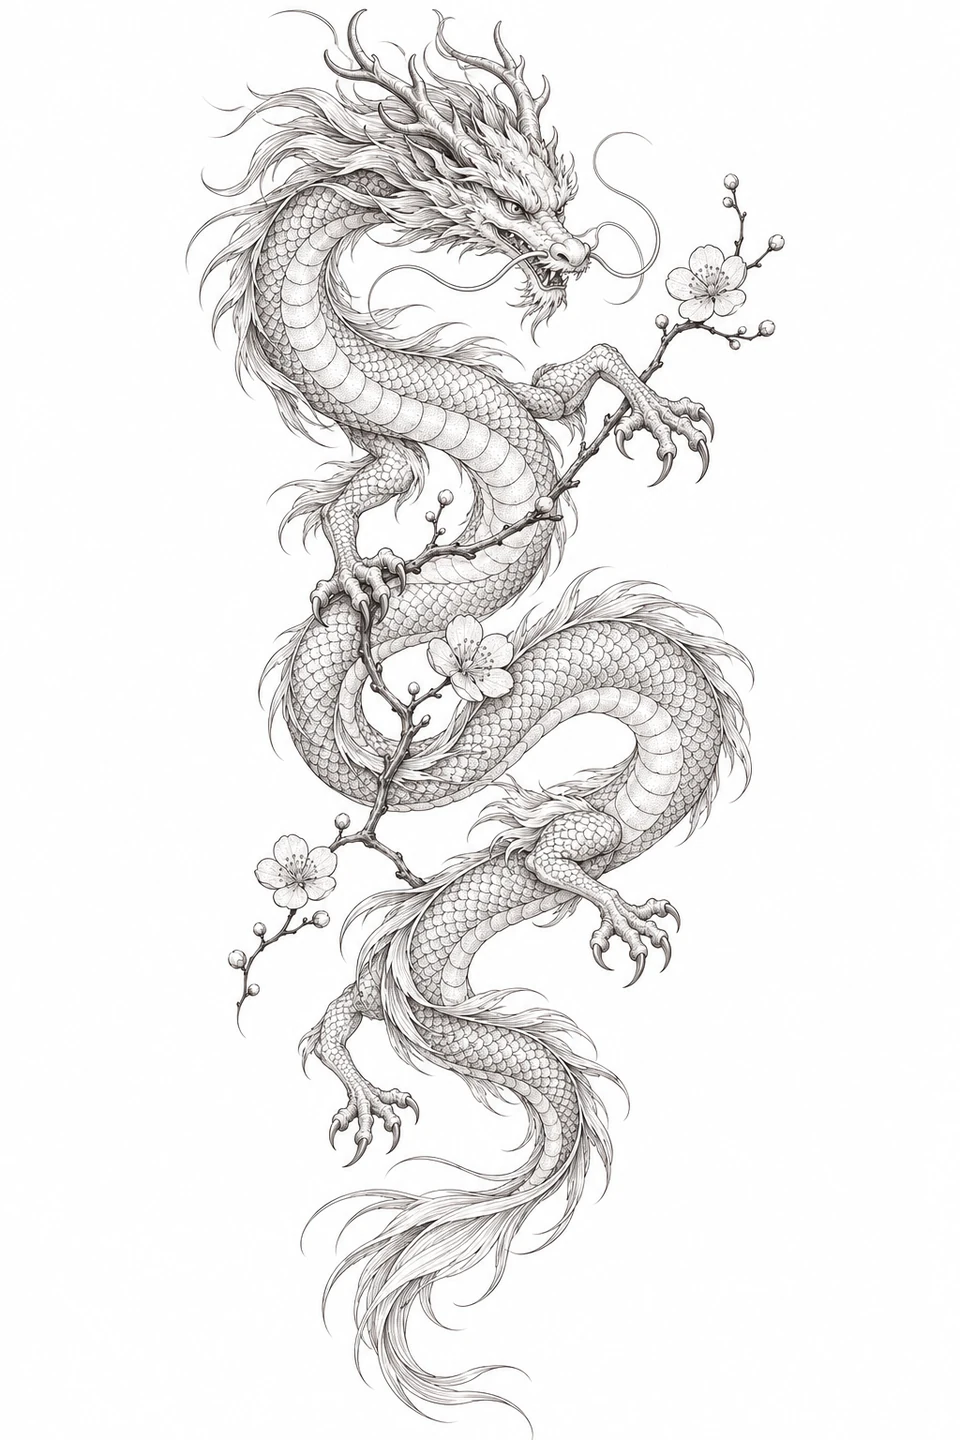
Motif background
A Ming dynasty badge at The Met offers a documented example of a dragon surrounded by plum blossoms. The museum connects such badges with the winter solstice at the Chinese court. This digital drawing is its own composition, with the dragon threading around a branch. The historical badge gives context to the pairing of motifs.
The Met’s dragon and plum blossom badge
Placement to compare
Try the paper silhouette along a forearm and along a calf. Notice where the head, highest blossom, and last turn of the tail sit when the long curve is seen from the front.
Linework and shading to discuss with your artist
Ask the artist to distinguish the strongest outline from lighter marks for scales and petals. The places where the branch crosses the body are useful examples to discuss.
Needle grouping terminology from Cheyenne
Decide whether the dragon or the branch leads
A vertical layout lets the dragon head, the turning body, and the flowering branch be read in sequence. The silhouette has a different rhythm from the Blackwork Serpent, where an S-shaped coil and bold body carry more of the image on their own. Choose the dragon when the conversation is about how the animal and the botanical elements interact. Choose the serpent as a comparison when you want to judge the space a single curving body takes without blossoms spreading to the side. Mark the widest flower and the broadest coil on a mockup to see which sets the usable width.
Try one tracing in which the branch stays legible and another that puts the emphasis on the dragon. Where a limb, stem, or whisker meets the coil, decide what sits in front before you start adding texture. If every contour continues through the crossing, the overlap can become difficult to read. End the line of the rear form at the foreground boundary in your tracing and compare it against the source. A few clearly ordered overlaps can preserve the sense of the dragon winding around the branch even when a quieter version carries fewer scales.
Compare the shape at the size you plan to use
Mark the distance from the dragon’s whiskers to the end of the tail and record the width at the coil with the widest spread of blossoms. Lay the full paper outline lengthwise along a forearm or calf mockup. Rotate it a little while leaving the head in the same position. If a blossom falls outside the measured area as the tail moves inward, compare a different angle before reducing the entire drawing and losing space inside the tight turns.
A comparison checklist for Plum Blossom Dragon
- Follow the S curve of the dragon separately from the rising blossom branch.
- Where the body crosses the branch, keep the boundary between the two shapes and compare a draft with fewer scales there.
- Use the head and the angle of the stem to compare which end should face up on the paper mockup.
Make a tracing of the dragon alone and put the branch back on a second copy at the same scale. Read the curve of the body from the head through the middle turn on both copies before checking the blossoms. If a flower seems to interrupt the coil on the combined version, note whether a petal edge or a dark scale is responsible. A quieter line at the interruption can keep both subjects readable while the rest of the branch retains its detail.
Decide which details belong in the linework
Check the small opening between the branch and the inside of the middle coil. Use a clearer edge where the front form crosses the rear one and keep the scale marks lighter and separated from that crossing. Try omitting the small scales immediately next to the stem while retaining the outer curve and whiskers. If that opens the junction without flattening the shape of the body, leave the fuller scale pattern on the original reference for the artist to review.
Choose one narrow gap that matters to the subject, then follow the adjacent lines through the preview. The gap can be more informative than the nominal thickness of either stroke. Keep the main contours and compare one version with fewer inner marks. This makes it easier to see whether the outline or the interior detail needs attention.
Check a plain-paper print at actual size
Print the coil and branch junction at the proposed size on plain paper. If a scale mark seems to continue into a blossom stem, trace the shared-looking segment on the proof and compare it with the original. Make a second print at the same scale after ending the rear line at the front edge. If the crossing becomes legible, keep the original size. If the two silhouettes still meet across several junctions, compare a larger outline before removing any blossoms.
A lengthwise print can force a sheet boundary across a turn in the body. If that happens, align the long edge of the branch and the outside of the coil in the overlap before looking at small scales. Then see whether the head and tail still follow one continuous path across the joined sheets. If only a few petals or a whisker appear on the next sheet, adjust the printable margins or position before discarding that part of the illustration as surplus. See the actual-size printing guide for calibration and page alignment.
Keep a record of the direction and the chosen draft
Mark the head end and the side from which the blossom branch enters on the chosen proof. This records the direction even when the paper is rotated to fit a longer mockup. Keep the original illustration beside the print version, especially if you removed scales at the body and stem crossing. A filename that includes the chosen height and a short note such as branch left makes it easier to distinguish a mirrored export from a second tracing with a different set of simplified scales.
 Tattoo Stencil
 Buy me a coffee