 Tattoo Stencil
Design notes
Keep the climbing line continuous. The small side branches should read as accents to the main stem.
Artwork source
Vector line art from the Tattoo Stencil collection.
 Buy me a coffee
Botanical · Tattoo stencil design
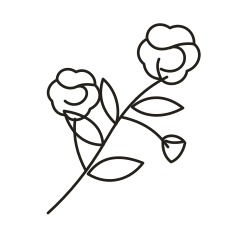
A rose bloom on a climbing diagonal stem with branches and pointed leaves.
Keep the climbing line continuous. The small side branches should read as accents to the main stem.
Vector line art from the Tattoo Stencil collection.
The diagonal stem gives this study a different rhythm from the Rose Branch. Your eye enters at the loose tail in the lower left, passes the smaller bloom, and lands on the larger flower above. The leaves alternate along the way, and the closed bud on the right pulls the composition off its main axis. Compare a long straight paper strip with one angled across the space you are considering. In both positions, check whether the end of the stem has enough clear paper to finish the curve.
On the smaller proof, look at the join under the larger flower and the short branch that carries the bud. If either gets dense, simplify the fold closest to the stem before removing an entire leaf. The difference between the two flower sizes helps the diagonal read as growth. Keep that proportion when adjusting the draft, and use the lone bud as the orientation marker when comparing a mirrored copy.
Mark the bend of the stem between the lower leaves as the middle of a paper forearm mockup. Try the drawing along the mockup at a shallow angle, then turn it until the larger bloom sits above that mark. Compare how much of the side bud and the long pointed leaf remain visible from the front. When trimming the paper, keep space past both ends of the drawing so the stem and upper bloom can be judged separately.
Put a clear sheet over the drawing and mark the centers of the two open blooms, then join them with a pencil line on the overlay. Now trace the actual stem on that sheet. The distance between the straight line and the curved stem shows where the branch takes up more room than the flowers suggest. Use the overlay to compare an upright arrangement with a diagonal one. If only the stem falls outside the paper mockup, you have a placement problem before you have a detail problem.
The small leaf that points upward just below the large bloom comes close to the diagonal stem. Follow the pale wedge between those outlines before judging the folds inside the flowers. If the wedge closes at the chosen scale, shorten the leaf at the point where it crowds the stem. Keep the main stem continuous and preserve the leaf tip. Compare that version with an edit that removes a petal fold instead so you can see which change clarifies the junction.
Follow the line from the tip of the flower or leaf to the end of the stem. Where petals overlap, decide which edge describes the front petal. If both edges merge in the proof, keep the stronger boundary and try a simpler version of the smaller fold. Leave the outline in proportion.
Print the draft with the high bloom and the little hanging bud both inside the sheet margin. At actual size, inspect the short bar across the hanging bud. If it runs into the bud outline, try a second copy with that bar omitted while keeping the outer shape and the attachment point. Lay the two proofs beside each other and check whether the bud still reads clearly on the simpler copy. If it does, that line can stay in the reference rather than in the stencil.
For a tall proof that has to span sheets, look for a page break on the relatively open length of stem below the first leaf. Keep the stem visible in both copies of the overlap and align its curve before joining the sheets. A mismatch is easy to spot there because the curve should stay smooth as it crosses the join. If your layout puts the join through the lower flower instead, compare the petal boundary and the nearby stem before trimming either sheet. See the actual-size printing guide for calibration and page alignment.
Label the two open blooms separately on a spare copy. The bloom on the left is lower and sits closer to the long bare end of the stem, while the upper bloom finishes the climb. Mark which way the bare end is meant to point on the placement mockup. If you keep a turned or mirrored alternative, describe the position of the lower flower in its filename. That leaves a clear orientation cue even if a cropped preview hides the end of the stem.