Motif background
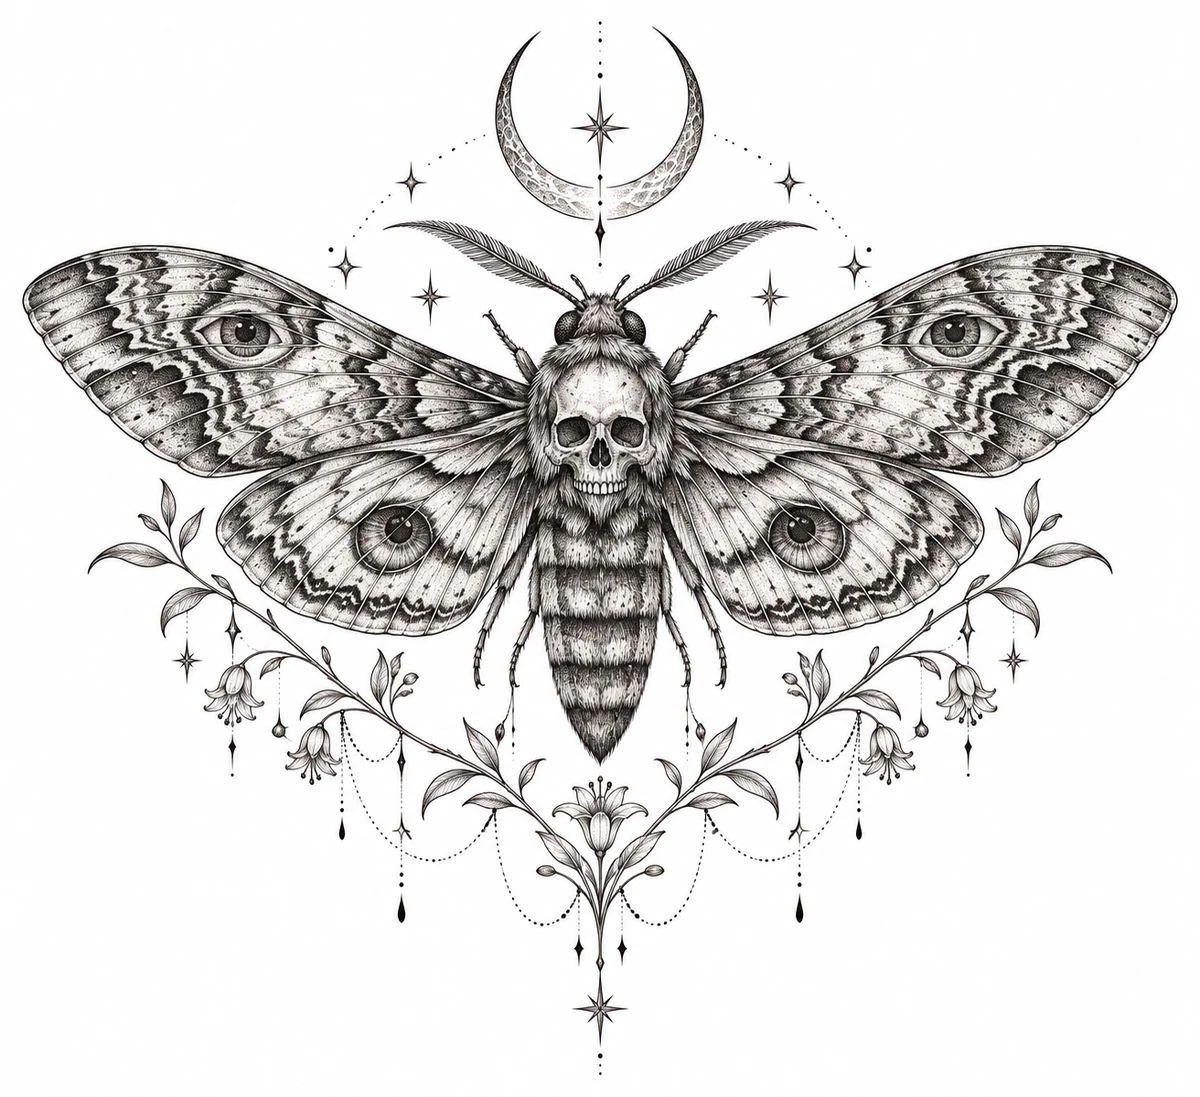
The Natural History Museum describes the skull-like marking that gave the death’s-head hawkmoth its ominous reputation. The wings, moon, and foliage here form an ornamental interpretation. The living moth gives the central marking its context, while the botanical frame belongs to this composition.
Natural History Museum on the death’s-head hawkmoth
Placement to compare
Compare a centered mockup across the upper back with a narrower one on the upper arm. Check whether both wing tips fit in the same view and whether there is room above them for the crescent.
Linework and shading to discuss with your artist
Talk with the artist about retaining the skull-like light area against the darker body and deciding which wing bands need outlines. Keep a lightly marked version available if the surrounding foliage starts to crowd the body.
Needle grouping terminology from Cheyenne
Choose between a full ornament and a wing-first study
This moth works as both a wide wing silhouette and a taller ornamental grouping. Compare the full grouping with a sketch showing the wings and crescent alone. If the available area is wider than it is tall, the smaller grouping can show how much space the wings need without the botanical accents taking up the ends. If you want the composition to draw the eye lengthwise, the crescent and foliage give the center of the moth a continuation beyond the wings. Compare it with the Dotwork Luna Moth if you want a wing study with a lighter treatment inside the outline.
Look at the kind of symmetry you want to retain. The outside wings and the center of the body can stay balanced even if individual decorative marks vary across them. Select a few markings whose positions help the pattern read, such as a boundary that divides the same area on either side. Bring those marks into a tracing before deciding whether to keep the smaller ornaments. This order makes it easier to distinguish a moth with a deliberate wing pattern from an outline that only has scattered marks inside it.
Compare the shape at the size you plan to use
Measure the outer wing tips and the full height from the moon to the lowest ornament as separate limits. On a wider paper mockup, center the body and see whether the wings stay visible as the sides curve away. Keep the moon and the lower drops on the mockup while moving the wings up or down. If either ornament runs outside the marked space, compare the shorter wing-first arrangement at the same span to see what changes without shrinking the wing pattern.
A comparison checklist for Death’s-Head Moth
- Align the central body and moon when comparing the left and right wing silhouettes.
- Keep enough room between the patterned wings and botanical accents to tell where each shape starts.
- Use the centerline as the orientation reference. Mark the end with the crescent on the print instead of relying on the paper edge.
Compare the wing pattern with the upper and lower ornaments briefly covered, then uncover the whole proof. Look for the same markings on the paired wings before deciding which ornament belongs in the surrounding space. The moth should remain readable while the moon, leaves, and drops take a supporting role. If the foliage competes with the central line, test a version that keeps the larger marks but drops the tightest ones near the wing edge. Keep the wingspan fixed so the ornament change is easy to isolate.
Decide which details belong in the linework
Keep the eye-like wing markings separated from the nearest dark stripe. Check the small light shape inside each marking on both wings before thickening the edges. If the surrounding texture presses into it, omit the tiny lines closest to the opening and retain the main ring. Use the original for the darker tones on the body and in the wings. That keeps the main bilateral pattern legible while leaving room for the moon and foliage to stay lighter around it.
Choose a primary silhouette and a supporting detail before evaluating the smaller marks. A central motif can carry the composition while leaves, dots, or secondary shapes provide balance. Compare the space between ornaments where the forms are closest. Keep a copy of the detailed reference if you prepare a simplified proof.
Check a plain-paper print at actual size
On a plain-paper copy, follow the same band from the body toward the tip of each wing. If a ring closes on one side, mark it and compare it with the corresponding ring on the other. A clean ring on only one wing may point to a local dark patch in the drawing. If both close, try a larger wingspan or a simpler inner stripe on a second proof. Keep the body centered across both copies to judge whether the change unbalances the design.
If the spread wings require tiled sheets, preserve the body axis on a single sheet when possible. At the overlap, align an outer wing edge and the nearest band before comparing the two matching wing spots. An offset can make one spot seem narrower than its partner even when both were drawn the same way. Check the top and bottom margins afterward so a missing moon or lower drop is recognized as a clipped print rather than an intentional change to the ornament. See the actual-size printing guide for calibration and page alignment.
Keep a record of the direction and the chosen draft
Record the wingspan and total height separately when you send the proof. A version without the lower ornaments can have the same span and a different height, so name the ornament choice as well as the size. Use the moon end to mark the top on the sheet. If you simplified a wing band, note which paired marks were preserved and include the original as a separate reference. That makes it possible to assess balance after reprinting or moving the design on a paper mockup.
 Tattoo Stencil
 Buy me a coffee