Motif background
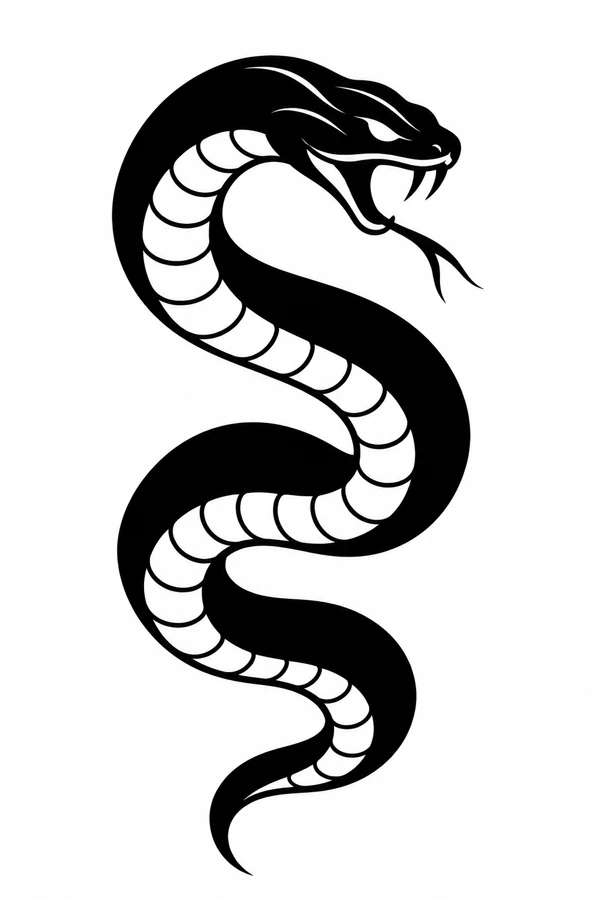
The serpent’s alternating dark body and light belly bands create a graphic figure with a clear turning motion. The openings have a visual parallel in relief woodcuts, where cut-away areas leave the paper clear. Here the bands narrow or widen at each bend, showing how the body turns inside the silhouette.
The Met’s introduction to woodcut printmaking
Placement to compare
Compare an upright forearm mockup with a slightly diagonal calf layout. In each version, mark the widest bend and the open space in front of the head. Look at whether the taper can finish without meeting a nearby design.
Linework and shading to discuss with your artist
Discuss a liner for the outer contour and a separate grouping for broader solid black areas. Compare belly bands at the proposed scale and agree which ones need to remain open before the artist plans the fill.
Needle grouping terminology from Cheyenne
Follow the coil from the head to the taper
The head and open mouth start the movement at the top. The body then alternates solid black curves with pale, segmented belly bands before ending in a narrow tail. The Blackwork Raven takes up width through its wings, while this serpent travels down a slimmer vertical area. For a long placement mockup, such as a forearm or calf outline, mark the parts of the drawing that reach farthest to either side. Those bends are where the design needs room even though the overall gesture is vertical.
Compare a version that keeps the head, outer coil, and tail while using fewer pale divisions in the tightest bend. A few well-separated bands can show the body turning through the coil more clearly than a dense row of small marks. The open mouth and tongue are a separate decision. View them in relation to the head before simplifying either feature. The outer curve still needs to lead from the head toward the first bend, so changing the angle of the head can affect how the entire figure reads.
Compare the shape at the size you plan to use
Place a ruler across the widest bend of the paper cutout rather than measuring only the length from the head to the tail. On a vertical forearm outline, check where the open jaws project and where the next bend reaches the opposite edge. Rotate the same cutout slightly on a calf sketch to see whether that bend leaves more space at the side. If the tail now runs into a boundary, compare a smaller full silhouette before shortening it or clipping the head.
A comparison checklist for Blackwork Serpent
- Measure the widest bend across the full S curve, including its pointed end.
- Look at the pale belly bands where the coil narrows. Keep the bands distinct in a reduced study before adjusting the exterior silhouette.
- Label the direction of the head on the print and check where the long curve finishes.
Trace the outer S-shaped body on a loose sheet and mark the turn where the open plates give way to solid black. Make a draft with a shorter run of interior divisions and compare how clearly each version shows the direction of the bend. Keep the open jaws on both copies while judging the coil. If your eye loses the path from head to tail after an edit, recover a division at the turn before adding more divisions along the straighter section.
Decide which details belong in the linework
The body switches between deep black and the pale belly plates as it turns. At the narrow bend, compare the last two clear plates with the first part of the solid curve. Keep enough of that change to show which side of the body faces out. On a separate draft, combine a pair of short divisions where the pale band tapers. Preserve the outside edge and the shape of the mouth while comparing that edit. Narrowing the entire black area would change the weight of the coil.
Look at each light opening inside the dark silhouette. The openings separate feathers, leaves, or bands that would otherwise read as one shape. Keep the biggest separations when preparing a reduced proof. A smaller opening can be widened in a working draft and compared against the original at the same size.
Check a plain-paper print at actual size
Choose a narrow belly section and the opening in front of the tongue as independent checks. If the belly has turned into one dark band but the mouth is clear, compare a draft with a simpler plate pattern at the same height. If the opening at the jaws has also vanished, test a larger proof before changing both shapes. When you place the two proofs side by side, cover the tail briefly and see whether the head still leads naturally into the first curve.
Inspect the full tail and the tip of the tongue in the print preview, since they can extend beyond the area occupied by the thick body. If the paper proof is tiled, use an overlap that gives you a continuous body edge to match. Avoid relying on a single short belly band as a reference. After joining the sheets, run your eye from the open jaws to the next solid curve and make sure the pale divisions still follow the intended turn. See the actual-size printing guide for calibration and page alignment.
Keep a record of the direction and the chosen draft
Mark the direction of the head and the side where the pale plates first appear on the selected sheet. A reversed version changes both references even if the outline still reads as an S. If you made a shorter run of divisions, describe where it starts and stops rather than calling the file simply cleaner. Share the whole coil with any enlarged detail so an artist can see the relation of the jaws, first turn, and narrowing tail before comparing versions.
 Tattoo Stencil
 Buy me a coffee