Motif background
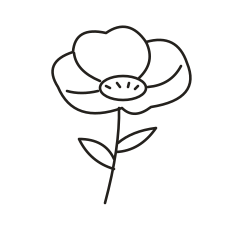
The open bloom and long stem make this a botanical line drawing. Imperial War Museums documents a separate use of the poppy as an emblem of remembrance, including the early public appeal. If remembrance is part of the brief, tell the artist before choosing a color or adding other details. The illustration supplies an open flower shape for that conversation.
Imperial War Museums guide to the First World War galleries
Placement to compare
Set the stem on a forearm mockup and compare the same bloom on an ankle sketch. Measure the flower head on each proof, since the stem alone makes the motif look narrower than it is.
Linework and shading to discuss with your artist
Compare a clean liner outline with a second draft that gives one petal fold more weight. Ask which marks near the small center can remain open without losing the sense of overlapping petals.
Needle grouping terminology from Cheyenne
An open outline with the bloom as its widest point
The bloom is much wider than the stem and forms the top of the composition. Short petal folds guide the eye toward the small oval center, while the two leaves keep the lower half from looking bare. The Open Poppy has a more pronounced seed center and fuller petal overlaps. Compare the two if you are choosing between a lighter reference for a narrow arrangement and one that can give the flower head more room. The Minimal Poppy can keep a short stem without losing its recognizable bloom.
Sketch the outline beside any other stems or leaves you plan to place nearby. If the neighboring design already has dense foliage, the open spaces on either side of this stem can give the two pieces a little separation. To compare a version without one of the small folds, cover that fold rather than trimming the flower head. You can then see how much depth the remaining marks suggest. If the bloom begins to read as one flat shape, return the fold that best describes the petal overlap.
Compare the shape at the size you plan to use
Make a paper cutout that follows the flower head and keeps both leaves, then mark the widest point of the bloom and where the lower stem changes direction. Slide the cutout along a forearm outline and compare where those points land on a shorter ankle mockup. Test turning the stem instead of narrowing the flower first. The bloom may fit when it sits over a wider part of the sketch even though the two leaves need some extra room farther down.
A comparison checklist for Minimal Poppy Outline
- Keep the broad bloom, the narrow stem, and the two leaves inside the same measured outline.
- Compare the gap between the open leaves and the stem before changing the detail at the flower center.
- Use the side of the lower leaf as the reference point if you reverse the paper study.
Use tracing paper to compare the bloom with and without the little dashes in the oval center. Keep the main petal folds fixed and look at whether the flower still has a clear focal point. Then move your attention to the lower branch and try covering one leaf at a time. Those are different edits. Simplifying the seed marks changes the emphasis inside the bloom, while removing a leaf changes how the stem occupies the space below it.
Decide which details belong in the linework
Separate the marks that divide petals from the short dashes in the oval center. The petal folds end at different distances from the oval. Keep the fold that makes the clearest overlap and compare dropping one short center mark if the area starts to look dense. Check the two leaf tips independently of the bloom. Where a leaf approaches the stem, preserve the visible opening before trying a heavier outline. That opening does more to describe the branch than an extra line at the center.
Check the outline against a plain background. A missing contour or a crowded accent changes the whole silhouette when there are few marks. Compare the distance between the smallest accent and the main shape on both sizes. Keep open areas intentional when preparing a draft.
Check a plain-paper print at actual size
Look first at the oval and short dashes in the center of the 100% proof, then trace the open area inside each leaf with your eye. If the dashes have joined but the oval and leaf openings are clear, compare a center with fewer marks at the same width. If the leaf gaps have also closed, try a larger copy before altering both sides of the outline. Hold the stem height constant when comparing edits to the flower center so the change is easy to isolate.
For a one-sheet print, inspect the two leaf tips and the edge of the widest petal before cutting around the drawing. A thin missing tip can be hard to spot against the page edge. If a larger proof needs tiles, align the repeated stem curve first when it crosses an overlap. Then look for the open leaf area closest to the join and compare it with the same gap in the PDF. Keep the flower head on a single page where the layout allows. See the actual-size printing guide for calibration and page alignment.
Keep a record of the direction and the chosen draft
Mark the side with the leaf that extends farther from the stem, and write down the full bloom width before comparing a reversed copy. Keep the full outline available alongside any crop showing a change to the seed marks. If you tried an open center and a fuller center, name those versions separately and record whether the stem length stayed fixed. That makes the two files useful for reviewing detail without accidentally comparing a flower that was rotated, flipped, or resized at the same time.
 Tattoo Stencil
 Buy me a coffee