Motif background
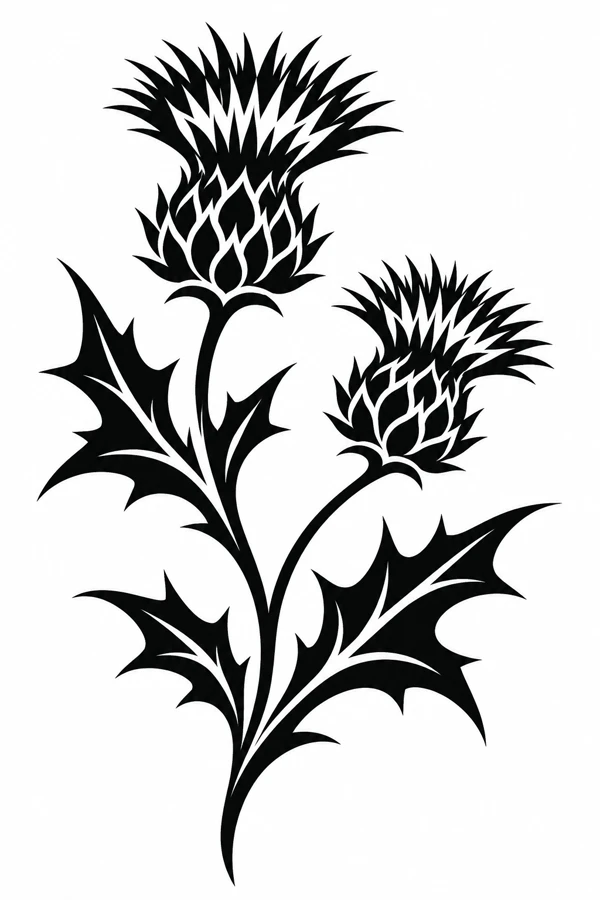
The thistle has an established public association with Scotland. The Royal Mint’s catalog shows a thistle and royal diadem representing Scotland on an earlier pound coin. This composition uses two flower heads, long angled leaves, and white cutouts to make a separate botanical study. The paired stems give it a diagonal rhythm.
The Royal Mint’s pound coin designs and specifications
Placement to compare
Try a forearm mockup with the tallest bloom near the wider end. A calf sketch also gives the two heads room to sit at different heights. Compare the pointed side leaves against the measured width.
Linework and shading to discuss with your artist
Ask how the artist would keep the fine outline of each flower distinct from the filled leaves. Check the space between the stems and the largest cutouts before deciding how much texture to keep inside the spiky heads.
Needle grouping terminology from Cheyenne
Compare the spiky heads with the larger leaf shapes
Two flower heads sit at different heights and branch from the same lower stem. The clusters of pointed spikes are small compared with the long, angular leaves, so both scales of detail are visible at a glance. Compare the Dotwork Fern if you want a botanical silhouette with lighter interior texture. The thistle creates more contrast and has two separate points of focus above the foliage. A placement mockup needs room around the taller head and beside the leaves that extend diagonally.
Try a simplified drawing that keeps each flower head intact as a shape and uses fewer marks to describe the interior. Then compare how the flowers look above the open cutouts in the leaves. If the blooms turn into a single dark mass at the size you are considering, separate their silhouettes more clearly before adding detail back. A short, narrow area may fit one stem more easily, so compare that option with the complete pair before cropping both sides of the existing composition.
Compare the shape at the size you plan to use
Keep the two bloom centers and the outermost pointed leaves marked on the paper cutout. Use the marks to compare a straight forearm mockup with a slightly angled calf layout at the same scale. Watch where the lower bloom sits when a leaf runs close to the edge of the paper area. Rotating can make more room for a side leaf and at the same time move the taller head out of the intended area. Compare the whole pair before trying a single-stem version.
A comparison checklist for Blackwork Thistle
- Measure from the higher flower head to the end of the stem, then include the angled leaves in the width.
- Check that the cutouts still show where the leaves cross. If they close, simplify the leaf interior before changing both stems.
- Use the taller flower head to label the side of the proof.
Compare the space between the flower heads with the larger cuts between the angled leaves. Mark one open shape that helps you tell which stem each leaf belongs to, and preserve it in both drafts. On a comparison copy, soften a small division inside the lower flower rather than altering the gap between the stems. Then look at the design with both blooms visible. The useful edit lets the heads remain recognizable while keeping a clear route through the leaves below.
Decide which details belong in the linework
Treat the lattice-like shapes below the spikes and the open cuts in the leaves as two different scales of detail. Keep the larger gaps that distinguish the stem and the angled foliage. In the tighter head, try removing a small interior division before softening the outline of the spikes. Keep the edge that separates the two stems where they approach one another. Compare the altered draft with the original to see whether the flowers still read as separate heads at different heights.
Look at each light opening inside the dark silhouette. The openings separate feathers, leaves, or bands that would otherwise read as one shape. Keep the biggest separations when preparing a reduced proof. A smaller opening can be widened in a working draft and compared against the original at the same size.
Check a plain-paper print at actual size
On the actual-size copy, inspect the lower flower head first, then compare one pale opening in its leaf with the corresponding open space in the taller half of the drawing. If the smaller head has darkened while the leaves are still clear, simplify a few marks inside that head and print again at the same size. If the stems also look joined, compare a larger proof before deleting more flower detail. Use the leaf points to check that the silhouette has stayed constant during the comparison.
Leave room around the tallest spikes and the longest leaf tips before printing, since the narrow ends of those shapes can be lost near the page border. If the outline is tiled, check where the seam meets the two stems. Align a long section of stem or leaf edge first, then compare the negative space between the two stalks with the PDF. A seam that shifts one stem can turn two distinct leaves into what looks like a single dark shape. See the actual-size printing guide for calibration and page alignment.
Keep a record of the direction and the chosen draft
On the back of the proof, label which flower sits higher and which leaf points toward the outside of the mockup. Keep that reference visible if you compare an angled placement with a straight one. Mark any simplified flower interior on a duplicate rather than cutting away the original. If you send the comparison to an artist, include the full pair of stems so the edited flower can be judged in proportion to the leaves and to the head above it.
 Tattoo Stencil
 Buy me a coffee